Toolbox
My Recording Gear Recommendations
Here is my short list for all the best gear, information and resources that I use as a voice actor. These are my recommendations based on years of research, trial and error, and in-the-field experience.
If you buy any of the items using the links below, I will earn an affiliate commission from Amazon. The price for you doesn’t change, but each purchase helps support this site and my podcast. Thanks!
Recording Software
For Mac or PC:
You can use any audio recording software you are comfortable with, whether that’s Apple’s Garage Band for Mac, Adobe’s Audition, Reaper, Avid’s ProTools or anything else. Each have different plug-ins and audio controls, but all of them have equal sound quality when recording since they are all simply manipulating digital audio data that has been imported into your computer via USB or Thunderbolt.
For free recording programs, a good starting program is Audacity.
Avid’s ProTools Intro is also free, but be warned, Pro Tools is a multi-track recording program that has a much steeper learning curve than a simpler program like Audacity.
For iPad:
For iOS devices, a good recording program is Twisted Wave Recorder App.
Recording Hardware
For Beginners:
If you’re just starting out, the simplest way to get high quality sound is to use a USB microphone. Unfortunately, very few USB microphones sound good enough to record professional voice over quality sound. Most are designed for podcasting and sound tinny or thin. Here are my recommendations for beginner microphones. If you want to get serious about voice acting, you’ll want to plan on upgrading your microphone in the future to an XLR Microphone which I recommend below in the
Intermediate and Pros section.
(Prices below are approximate.)
USB Microphones:
Blue Yeti – $90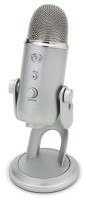
For years, the Blue Yeti has been consistently the best value for a good starter microphone. The multiple polar patterns are not really useful for voice acting, so just leave it in cardiod mode. However, the direct headphone monitoring jack is essential to avoid any latency or “echo” when recording yourself into the computer. Just be aware that this microphone is large and heavy with a sizable desktop stand.
I also advise purchasing a Pop Filter for the Blue Yeti to protect the sensitive diaphragm of the microphone and to avoid wind noises.
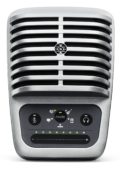 Shure MV51 – $200
Shure has a series of microphones called their Motiv line. One of the major advantages of these microphones is that they can work with both your computer and your iOS devices using the included lightning cable. The best of the Motiv line for voice over is the MV 51. It has a 1 inch diaphragm which is the largest diaphragm of any microphone in its class. I’ve actually purchased one myself to use when I’m traveling. While it’s no replacement for my home studio, I’m very impressed with its sound quality and convenience!
NOTE: Make sure to set the MV51 to the “flat” setting when recording with no EQ. Do not chose any of Preset Modes such as “Speech”, “Singing”, “Acoustic”, or “Loud”. Those EQ settings will unnaturally color the sound of your voice.
Entry Level Headphones:
While your microphone quality is important, so is your headphone choice. You need to be able to hear the subtleties of your recording with headphones that accurately represent your voice. Most earbuds just won’t cut it. It’s best to use over the ear headphones that will block out as much outside sound as possible so you can focus on the quality of your recording. Here are the headphones I recommend for beginners:
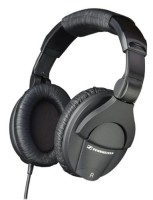
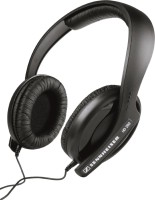 Sennheiser HD 202 II – $37
These are probably the cheapest headphones that can still be found in a professional recording studio. They can’t compare with some of the industry standard headphones which usually cost around $100, but if you’re on a very tight budget, these closed-back headphones are far superior to the earbuds that came with your smartphone.
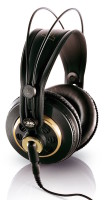 AKG K 240 – $79
A musician’s favorite, the AKG K 240s are possibly the most common headphones found in any recording studio. They have a relaxed, un-hyped sound which prevents ear fatigue. They’re also supremely comfortable to wear for long periods of time. Their only drawback is that they are not completely closed so they do leak a little sound. That means that you’ll hear more of the room around you while using them, but it also means that if you turn up your headphone volume too high, your microphone might pick up the sound leaking out of your headphones. However, if you use them at a reasonable level, they are usually fine.
Inexpensive Acoustical Treatment:
The single most important thing you can do to improve the quality of your home recordings is to make sure you have a space to record in that is acoustically treated. Unwanted reverberations or echoes in your recording space will make your recordings sound unprofessional, no matter what microphone you’re using. Ideally you want a space that absorbs sound, but also isolates you from external noises. The first is sound deadening, the second is sound isolation. Sound Isolation usually requires lots of construction, or an expensive pre-made recording booth. However, you can start to deaden reverberations in your home recording space with the suggestions below. These are no substitute for a professionally designed booth, but they can help improve the quality of your recordings for auditions or projects that don’t have to be broadcast quality.
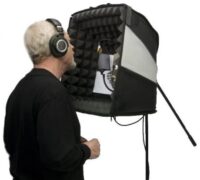 Portabooth Pro – $390
Harlan Hogan’s Portabooth Pro is a good solution for recording short voice over projects in less than ideal circumstances. I’ve purchased one myself and I’ve been impressed with the results. While it’s no substitute for my home studio, it works well for auditions and other recordings that don’t need to be broadcast quality.
 Portabooth Plus – $200
The Portabooth Plus is the entry version of the Portabooth Pro. It’s smaller size makes it easier to travel with, but it doesn’t offer as much sound deadening as the Pro version. Still, many of my students use it when they’re just starting out to help improve their recordings. It’s not as effective as a dedicated booth, but it’s much better than nothing.
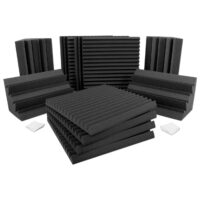 Auralex Acoustical Foam
Auralex is the most popular manufacturer of acoustical foam and with good reason! Unlike cheaper foam that’s used for bedding or packaging purposes, Auralex’s foam does not breakdown or come apart over time. I use Auralex Foam in my home studio and it’s served me well for decades. If you’re trying to treat a closet or other small room to use as a recording space, I suggest you check out Auralex’s Acoustics 101 page to learn more about their products and how you can use them to help treat your own home studio.
For Intermediates and Pros:
**NOTE: If you are looking to get a broadcast quality microphone and interface, my recommendation is to get the Neumann TLM 103 microphone and one of the Apollo Twin Duo interfaces either the Apollo Twin X Duo for Thunderbolt 3. You can find my full descriptions of them below.**
While USB microphones are an inexpensive way to begin recording yourself at home, when you’re ready to take your recording to the next level and be truly competitive in the voice over marketplace, you’ll need to use an industry standard microphone and a USB or Thunderbolt Audio Interface. Luckily, there are only a few microphones that I see used in studios regularly. All of them will require some sort of audio interface with a pre-amp to take their analog microphone signal, boost it, and then convert it into digital audio for your computer over USB or Thunderbolt.
(Prices below are approximate)
*To use any of these industry standard microphones, you will need a USB audio interface that has an XLR type input and supplies phantom power. The following interfaces satisfy those requirements.*
USB & Thunderbolt Audio Interfaces:
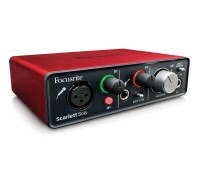
Focusrite Scarlett Solo (3rd Gen) – $100
If all you need is one channel of input for recording yourself for voice over, then the Focusrite Scarlett Solo is a great option. It has an XLR input with phantom power so you can use any of the condenser microphones listed below. It’s powered completely by its USB cord so there’s no need for an extra power cable. Plus it’s very small making it a good portable solution. The new 3rd generation version of the Scarlett Solo has even lower latency which is always nice. It’s a great starter interface and is perfectly good for auditions. However, if you’re looking to produce broadcast quality audio from your home studio, you may need to upgrade to something more powerful in the future.

Apollo Twin X Duo Gen 2 for Thunderbolt 3 Connections – $1100
If you’re ready to get the ultimate home audio interface, go no further than Universal Audio’s Apollo Twin system. You’ll never need to buy another interface. The Apollo Twin has ultra-pristine preamps with amazing headroom and low noise. Not only that, but the Unison system allows you to purchase plug-ins that allow the Twin to imitate industry standard preamps like the Avalon 737T. In fact, the Studio+ Version of the Gen 2 version of the Apollo Twin X has the Avalon 737T plug-in included! This preamp modeling isn’t done through simple software trickery. When you engage any Unison plug-ins, the Apollo actually modifies its physical internal circuitry to match the electronic impedance of these classic pre-amps. I’m using this interface in my home studio and it’s a huge upgrade from my earlier USB audio interface.
NOTE: The Apollo interfaces have built-in processors to help do all of their magic in real time to avoid latency. That means they are sold with in either a DUO (two on-board processors) or QUAD (four on-board proccessors) configuration. If all you are doing is voice over, chances are you will only ever need the DUO (two-processor) interface. The QUAD (four processor) interface is more useful for musicians who are recording multiple instruments at once. I own the Apollo Twin X Duo.
What about the Apollo Solo? You may notice that Universal Audio also sells an Apollo Solo for around $600. I would still recommend the Apollo Twin over the Solo. In comparison to the Apollo Twin, the Arrow does not have as much dynamic range, it’s not as quiet, and it pulls all its power from the Thunderbolt 3 port which is not ideal. If you’re going to set up a broadcast quality studio at home, I would highly recommend you go for the Apollo Twin system instead. In addition, there have been times when certain studios needed me to record two microphones at the same time in my home studio. In those situations, it was vitally important that I had the two identical microphone pre-amps of the Apollo Twin. The Apollo Solo wouldn’t have worked.
Studio XLR Microphones:
Below are the industry standard microphones I recommend.
*Each microphone below will also require:*
A Weighted Microphone Stand to hold your microphone.
An XLR Cable to connect your microphone to your interface of choice.
A Pop Filter to protect the sensitive diaphragm of the microphone.
(Prices below are approximate.)
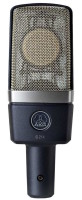 AKG C214 – $400
The AKG C414 is a workhorse microphone and has been used for voice over for years. In fact my demos were all recorded on an AKG C414. The C214 is the stripped down, less expensive version of the 414, but it retains the same capsule as its larger brother. The bottom line: you get the same sound as a 414 while spending less than half as much.
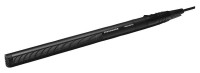 Sennheiser MKH 416 – $1000
The Sennheiser 416 is the film industry standard for recording dialogue of actors on a film set. It’s a shotgun microphone that is designed to pick up sounds at a distance. Voice actors realized that when used in close proximity, the sound of the 416 was very punchy and allowed a voice over to cut through loud music and sound effects. Because of this, the 416 is used extensively in trailers and in promo work. However, it is rarely used in animation work as its biting sound can seem harsh over long periods of time.
In order to use the MKH 416 with a normal microphone stand, you will need a Shotgun Microphone Shock Mount.
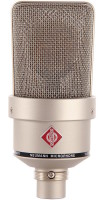 Neumann TLM 103 – Best Bought with a Shockmount $1200
Neumann microphones are the most commonly used microphones in voice over. Almost every studio I go into uses Neumann microphones. The standard is the U87, but it costs over $3000. The TLM 103 is the entry level version of the U87. It has the same capsule as the U87 but simplifies the circuitry to create a microphone that captures the essence of the Neumann sound at a more reasonable price.
Studio Grade Headphones:
If you’re going to spend the money on a truly industry standard microphone, then it’s time to make sure your headphones are of equally high quality. There are a number of industry standard headphones that are used in almost every recording studio I visit. These are the ones I recommend:
 Sony MDR7506 – $80
These are arguably the most popular headphones used in Hollywood productions. I’ve seen them used by more sound people on set and in studios than almost any other headphones. There’s good reason for that. They are closed back so they isolate sound well, they’re built solidly to withstand abuse, and they’re very pleasing to listen to. Some people find them a little “hyped” and not completely neutral in their sound, but they give you a great idea of what’s actually happening in your recording. If there are any flaws in your recording, you’re gonna hear them with the Sony MDR7506s.
Sennheiser HD 280 Pro – $90
The HD 280s are extremely neutral. Their flat response gives you an uncolored view of your recording. They’re also more padded than the Sony MDR7506 so if you’ve got large ears or would like extra cushion in your headphones, the HD 280’s might be your best bet. The only thing to note is that they are very tight fitting so if you have a larger than normal sized head they might be too snug.
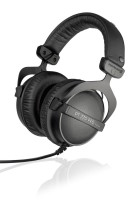 Beyerdynamic DT-770 Pro – 32 Ohms Version – $160
If you’re looking for a true upgrade, Beyerdynamic headphones are the luxury brand for studio grade headphones. Closed back headphones can often sound boxy and closed in. The DT-770s do a good job of making closed back headphones sound more natural and open. They’re also probably the most comfortable closed back headphones I’ve ever worked with. When I need to block out the rest of the world and hear what my recording sounds like, I reach for my own pair of DT-770s.
NOTE: The DT-770s come in 4 different impedance levels, 16 Ohms, 32 Ohms, 80 Ohms and 250 Ohms. If you don’t know anything about impedance, that’s fine. Chances are if you’re plugging directly into a USB microphone or USB/Thunderbolt audio interface, you’ll need to use the 32 Ohms version of these headphones. That version matches the impedance of most headphone jacks on smaller electronic audio equipment and is most suited to portable or home studio recording environments. It’s also the version I own.
Professional Level Acoustical Treatment:
If you’re going to make an investment in a professional quality microphone and audio interface, it is vital that you have a recording space that is also of professional quality. No matter how good your microphone is, it cannot compensate for bad acoustics in your recording environment. You must have a space that is acoustically treated. Unwanted reverberations or echoes in your recording space will make your recordings sound unprofessional, no matter how fancy your equipment. Ideally you want a space that absorbs sound, but also isolates you from external noises. The first is sound deadening, the second is sound isolation. The solutions below offer differing amounts of both.
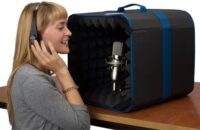
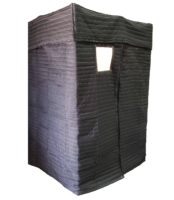 VocalBoothToGo.com – Soft Walled Mobile Vocal Booths – $900 and Up
While these booths do not offer hardly any sound isolation from outside noises, they are probably the most inexpensive way to create an actual recording space where you can be completely enclosed. They are portable and relatively easy to set up and take down. However, you’ll need to put them in a quiet room for best results.

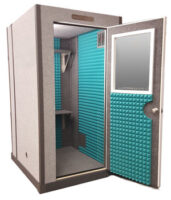
WhisperRoom.com – Hard Walled Vocal Booths – $3905 and Up
WhisperRoom.com and VocalBooth.com both offer a number of different pre-made vocal booths with different sizes and features. They have single walled and double walled designs. Obviously, the double walled designs will be better at keeping unwanted noises outside your booth, but they also increase the price. It may be tempting to get the smallest model, but remember, you will need room to move inside your booth and space for airflow. In addition, a very small booth can small boxy and unnatural if not acoustically treated properly. Make sure to explore their websites, do your research and ask the manufacturers plenty of questions before investing in one of these booths.
VocalBooth.com – Hard Walled Vocal Booths – $4895 and Up
VocalBooth.com and WhisperRoom.com both offer a number of different pre-made vocal booths with different sizes and features. They have single walled and double walled designs. Obviously, the double walled designs will be better at keeping unwanted noises outside your booth, but they also increase the price. It may be tempting to get the smallest model, but remember, you will need room to move inside your booth and space for airflow. In addition, a very small booth can small boxy and unnatural if not acoustically treated properly. Make sure to explore their websites, do your research and ask the manufacturers plenty of questions before investing in one of these booths.
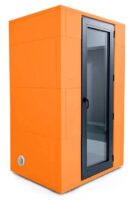 Studiobricks – Hard Walled Vocal Booths – Request a Quote
Studiobricks makes some of the fanciest and best looking pre-made vocal booths! Based out of Barcelona, their Focus and Focus+ booths are designed for voice over use. If you have the money, the Focus+ is a great option that will serve you indefinitely. Just make sure to order one well in advance of your needs. The booths ship from Spain and can take a while to arrive.
Home Studio Audio Consulting:
You believe you’ve created the perfect recording space, but does it sound as good as it could? You’re using industry standard equipment, but are you sure you’re using it correctly? If you don’t have a lot of experience working in professional recording studios want to make sure that your home recording setup is truly broadcast quality, the people below offer consulting services to help you fine-tune your system.
Jordan Reynolds – JordanAudio.ninja
I interviewed Jordan in episodes 160 and 161 of the podcast. He’s voice actor who also specializes in home recording equipment.
George Whittam – GeorgeThe.tech
George is well known in the voice over community for his depth of knowledge about recording equipment and acoustics.
Dan Lenard – Voice Over Body Shop – vobs.tv
Dan Lenard and George Whittam host an online show called the Voice Over Body Shop where they discuss all things technical about voice over. I’ve even been a guest on their show in episode 32!
Tim Tippets – VOTechGuru.com
Tim offers audio consulting as well as courses on making your recordings Audition Ready!
For Recording on the Road:
Voice Actors are expected to record auditions on a moment’s notice. This means that it’s vitally important to have a portable recording solution for when you are traveling. The microphones below will work with either a laptop with a USB-A type connection or an iOS device that uses a lightning connection:
Shure has a series of microphones called their Motiv line. One of the major advantages of these microphones is that they can work with both your computer and your iOS devices using the included lightning cable. The best of the Motiv line for voice over is the MV 51. It has a 1 inch diaphragm which is the largest diaphragm of any microphone in its class. I’ve actually purchased one myself to use when I’m traveling. While it’s no replacement for my home studio, I’m very impressed with its sound quality and convenience!
NOTE: Make sure to set the MV51 to the “flat” setting when recording with no EQ. Do not chose any of Preset Modes such as “Speech”, “Singing”, “Acoustic”, or “Loud”. Those EQ settings will unnaturally color the sound of your voice.
Crispin’s Personal Recording Equipment:
The Big Kahuna:
 Neumann U87 – Best Bought as the Set Z for $3700
If you really want to have the ultimate voice over microphone and use exactly what the best studios in the world use, you need go no further than the Neumann U87. Its richness and silky smooth tone have made it the most common microphone in voice over. I record on this microphone more often than any other, no matter which studio in LA I happen to visit. I fell in love with it so much, I got one for myself to use in my own home studio. Every episode of the Voice Acting Mastery podcast is recorded on this mic. If money is no object and you want to use a world class microphone, you have now arrived. Just make sure to get the Set Z package since it includes the shockmount for the microphone which is an absolute necessity.
My Studio Equipment:
For those who are curious, this is the actual recording equipment that I use:
Headphones:
Beyerdynamic DT-770 Pro – 32 Ohms Version
Genelec 1029 Studio Monitors (Discontinued)
Genelec 1091 Subwoofer (Discontinued)
When traveling I use my Shure MV51 USB microphone.
Happy Recording!